An eclectic blog about beads, beading and beyond


Friday, April 30, 2010

The changing traditions of the needle case – so much change and yet so little has changed


How important to you is a needle case and how do you keep it handy?


Apparently in times past (e.g. Ancient Egypt and 1st – 5th centuries in Northern Europe) a needle case was considered important enough to keep close at hand that it was buried with a person’s remains so that they had it with them in their afterlife. Depending on when and where you were buried your needle case might be made of bone, bronze, leather or tin although it’s basic shape was much the same – a long tube closed at one end with a removable stopper or cap at the other. In Ancient Egypt it is likely your needle case would be made from hollowed bird bones capped with cloth and a reed stopper. Interestingly, the North American Inuit also traditionally used hollowed bird bones for storing their needles. As the European tradition of burying needle cases with a person’s remains to keep them handy for the afterlife changed so did traditions of keeping needles handy during life. Needle cases in European societies were worn variously suspended on cords or ribbon from the neck, around the waist, on the wrist and from the shoulder and in different times and places they have been kept handy by being attached to belts, brooches and chatelaines. With changing fashions for keeping your needle case handy also came changing fashions in needle case decoration. I am not sure if the idea behind decorating the needle case was to make a fashion statement when you wore it or to make it easy to find when you needed it. Either way, you can see wonderful examples online of highly decorative antique and vintage needle cases made from intricately carved ivory, precious and semi-precious metals and elaborate embroidery and beading (I have provided links below to some delightful examples).


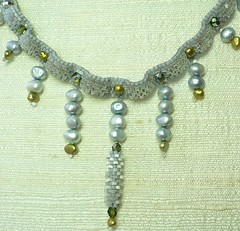
Amongst these changing fashions the basic shape of the needle case has changed little. It remains a long hollow tube with one end closed and a removable cap at the other. What my latest beaded needle case designs show (pictured above) that what also remains is the 16th century Venetian tradition of painting the tube and then decorating it with seed beads. I hope I have honoured the tradition and that these designs mean you will want to keep your needle case handy.


Sources

Tuesday, April 20, 2010

Midwives, Scissoroos and Sandpaper - tips for choosing and using beading thread cutters


At present I seem to have more blunt instruments for cutting thread than I do sharp ones. My current count of blunt instruments is two pairs of thread nippers, one pair of traditional embroidery scissors, one pair of nail scissors and one daisy wheel cutter. It’s clearly time to either get them sharpened or buy a new thread cutter. I’ve also decided its time to buy my first thread burner. Faced with decisions about what to buy I’ve been doing some research about the pros and cons of different thread cutters and reflecting on my own experiences with them.


As in all things, different thread cutters do different jobs. Here’s what I have found works for me.

General cutting of beading threads (So-No, Silamide, Nylon, etc)

  • Embroidery scissors
  • Thread nippers


Cutting Fireline and other fishing line threads

  • Craft scissors or special thread nippers as it blunts good scissors very quickly.


Getting into tight spots to cleanly cut thread

  • Embroidery scissors - the point needs to be very fine and sharp
  • Thread nippers - they seem to work well for me to do this job
  • Havel's Snip-Ez cutter. This is a new tool I am just about to try – our local Lyncraft shop stocks them.
  • Battery powered thread burner or zapper. This is another new tool for me but it apparently cuts the thread and melts the end into the bead so that it is like having a knot to secure the thread and it creates a very neat finish. I’ve been told it’s great to use on small stray bits of thread that poke through your beadwork.


Beading on planes

  • A daisy wheel thread cutter. It’s hard to make close cuts to the thread using a daisy wheel cutter so I tend to finish off the cuts once I am back on the ground. You can use your favourite close cut thread tool or a thread burner to do this.


Keeping the cutting tools happy for clean thread cuts

  • sharpen or replace cutters when they are blunt (see below on hints for sharpening yourself)
  • cut your thread on an angle so it’s easier to thread
  • use cheap scissors for Fireline (or similar) to avoid blunting your favourite more expensive cutters or keep a special pair of thread nippers
  • throw out your daisy wheel thread cutter once it goes blunt – the blade can’t be accessed to sharpen or replace it.


Sharpening your cutters

eHow has a great post on how to sharpen your cutters - http://www.ehow.com/how_4540603_instructions-sharpening-scissors.html. Two of their tips are remarkably low tech, cheap and easy to follow - I am off to try them after this post.

  • cut through fine grit sandpaper several times until they sharpen
  • wipe the blades with Isopropyl alcohol and then cut through aluminium foil several times until they are sharp.


A little bit of scissor trivia

My favourite find in researching thread cutters to buy was the Australian made Scissoroo embroidery scissors that have a kangaroo rather than the more traditional stork on the handle (see image above). Apparently the stork on embroidery scissors was first found on a set of clamps used by midwives in Europe in the 1800s to clamp the umbilical cord after birth. The stork beaks formed the clam (see the photo which I found on a Medical Antiques site - http://www.phisick.com/)


Many midwives did needlework in their spare time and kept their medical tools, including the stork clamp, close at hand in their sewing basket. For some reason the stork design and decorations from these clamps were then placed on embroidery scissors.


For some fantastic images of scissors in times past and a short history of the scissor visit the links below.


Sources

Dax's Designs in two new treasuries on Etsy over the weekend

Bead Geometry, Oval is a treasury featuring my Vintage Violets necklace.

Be Careful, It's Hot features my Hot Chilli Ziangle necklace.

Thanks to the curators for including these pieces in their treasuries.

Friday, April 16, 2010

Dax Designs Bead Art Friday fan and follower free offer

To thank all my Dax Beadart Facebook fans and bead blog followers I am offering them a fun free beading crossword today - if you would like a copy just post a comment in this post with your email address or do the same on my fan facebook page in the crossword post and I'll email the crossword to you in a PDF document. I have had fun creating it and hope you might have fun doing it.

Love to hear who is the first person to complete. Just let me know when you'd like the solution emailed.

Monday, April 12, 2010

Learning what not to do as beadweaver: the lessons never stop


Today I added two new ‘nevers’ to my beadweaver’s ‘top tips’:
  • Never reuse transparent beads if you have previously woven them on black thread.
  • Never combine new and reused beads in a project when you are beading at night.


These two ‘don’ts’ emerged from my beading my latest cuff design - ‘Giraffes at Sunset’. I love the design but I am just about to unpick about 5 cms of it because there is a noticeable colour difference between the new and ‘recycled’ transparent bright orange Delica beads (DB 744) I’m using in it. The recycled DB744s are much darker than the new DB 744s. I didn’t notice the difference when I was using them on Saturday night but in Sunday’s bright daylight it shouted at me. I can’t be certain what caused the older beads to darken but I have my suspicions. I had originally woven the recycled DB744s on black Silamide thread and I suspect that a deposit from the black thread left inside the beads has darkened them. Washing the beads may remove it but I’ll need to undo Saturday night’s weaving to test that out. Has anyone else had this experience?

I have been gathering my ‘what not to do’ beading lessons into a booklet of tips for successful beadweaving. In honor of my latest ‘what not to do’ lesson I’ve put my booklet in my Etsy Destash shop so others can learn from my mistakes. It contains 45 tips grown from my own experiences of what not to do. I hope they’ll make for happier and easy beading for all.

http://www.etsy.com/view_listing.php?listing_id=44608990

Friday, April 9, 2010

Mosaic from the Etsy Beadweavers Challenge April2010


Mosaic April2010
Originally uploaded by goodquillhunting
This is the fantastic mosiac of work for this months Etsy Beadweaver's Challenge - Light as a Breeze. A great array of talent inspired by the theme of the month. Pop by and have a look, even vote for your favourite.

Oops forgot to leave the link to the voting - here it is - etsy-beadweavers.blogspot.com/

Monday, April 5, 2010

When is ‘vintage’, vintage? Some efforts to define ‘vintage’ jewellery and beads

In April, my ‘destashing’ will emphasize all things vintage, so if you love vintage keep an eye out. Today's first listing is a collection of charming little glass and silver beads (also see photo) and, having decided to list them, I began to muse on what the term ‘vintage’ meant when applied to jewellery and beads. When could it be proper and ethical to describe something as ‘vintage’? An easy question to ask, but a hard one to answer, because the word ‘vintage’ is used in several - sometimes conflicting - ways.

Broadly, the ‘vintage’ of something refers to the era in which it was made or in which it first appeared or began. For example, the vintage of a wine is the year in which it was bottled. However, ‘vintage’ also refers to something that is no longer in fashion or contemporary – it is ‘aged’ or ‘oldish’ in some way. For example, a vintage car is one that is over 50 years old.

In the world of jewellery, ‘vintage’ is used in both ways – sometimes to refer to the era in which a piece is made, sometimes to refer to a piece that is ‘aged’, ‘oldish’ or even just previously owned. Thus, ‘vintage jewellery’ could describe jewellery that is made in 2010 but was previously owned. Its vintage (or era) is 21st century. However, for some jewellery purists, ‘vintage’ should refer only to ‘aged’ or ‘oldish’ jewellery; and while for some of these purists, ‘oldish’ means at least 15 years old, for others it means at least 25 years old.

Amongst this confusion, there is one clear spot. Once a piece of jewellery is 100 years old it can rightfully be called ‘antique’ jewellery of a particular vintage- for example, ‘Antique Georgian jewellery’.

Etsy’s guide for sellers blog offers some clarity:

‘Vintage: This aesthetic conjures concepts, forms and colors of days gone by, or the idea that “old is the new new." You can find a range of colors, from sepia to the most vivid hues and psychedelic or bizarre patterns.’

So ‘vintage’ can be an era and/or a description of something previously owned and/or oldish. There are some widely agreed eras (or vintage periods) for British jewellery that can help you name when an item was made:

  • Georgian jewellery (1714-1837)
  • Early Victorian (‘romantic’) jewellery (1837-1855)
  • Mid-Victorian (‘grand’) jewellery (1856-1880)
  • Late Victorian (‘aesthetic’) jewellery (1885-1900)
  • Arts and Crafts jewellery (1894-1923)
  • Art Nouveau jewellery (1895-1915)
  • Edwardian jewellery (1901-1915)
  • Art Deco jewellery (1915-1935)
  • Retro jewellery (1945-1960)

But what is ‘oldish’ and, therefore, vintage? Should it be more than 15 years old? More than 25 years? What do you think? When is a vintage, vintage?

Sources

Friday, April 2, 2010

Gossamer Dew entry into the Etsy Beadweavers April Challenge


gossamerdew10
Originally uploaded by Dax Designs
I have created this necklace and earring set as my entry into the Etsy Beadweavers April Challenge. The challenge is to bead something that evokes the theme - Light as a Breeze.

In making this set I was inspired by the light breezes on early spring mornings that gently move the dew drops on silvern gossamer spider webs creating beautiful gold and silver drops that shimmer in the early morning light. I have used silvern and gold pearls, shimmering faceted beads and sparkling grey seed beads to try to capture the sheen and colours of these 'gossamer dew' moments created by light eary spring breezes.

You can see the other entries in this month's Etsy Beadweavers Challenge by searching EBWC. To vote for your favorite piece please go to www.etsy-beadweavers.blogspot.com/. The voting begins on April 9 and ends April 15. You can browse the pieces on the EBW blog.

Dax Designs - now on Byhand.me Artisan Co-op